World of Level Design™
Tutorials to Becoming the Best Level Designer and Game Environment Artist (since 2008)
How to Create Roads in Hammer Source Part 5/8: Creating Curved Sloped Roads
Category: Source: CSGO SDK, Source: L4D 1 & 2
January 26, 2011

How to Create Roads in Hammer Source is 8-part series covering various beginner and advanced techniques on creating roads.
Part 5 is focused on:
- Curved Sloped Roads
Full 8-Part Roads Series with Hammer Source:1. Road Basics, Intersections and Adding Realism
3. Wide and Tight 90 Degree Turns
5. How to Create Curved, Sloped Roads
6. Brushes and Props - Blocking Roads Off
CREATE 90 DEGREE TURN
Beginning part of creating curved sloped roads is the same as if we were creating basic 90 degree turn. For more detail how to do so, watch/read Part 3 first, then come back here.
BRUSH NUMBER FOR DETAIL
How many brushes/sides do you need to use to have a smooth curved road?
This all depends on:
- How far you want your curved road to reach? How many units down?
- How complex do you want your brush to be?
- More brushes = better looking road, but more time to make it
It is best to use 12-16 sides.

Examples of 8 brushes/sides: bit too rough

Examples of 12 brushes/sides: nice better, smoother surface

HOW MANY UNITS DOES EACH BRUSH NEEDS TO BE RAISED/LOWERED
Figuring out how many units each individual brush needs to be lowered to reach a road below/above is important for keeping the curved surface smooth.
To figure this out simply take:
- Number of Brushes Of Curved Surface times Number of Units To Raise/Lower = Height Between Lower and Higher Road.
To simplify this:
You have a road, that will curve down to a lower road. The curved surface, 90 degree turn has 12 brushes. To create a smooth curve where each brush is lowered 8 units each (8 units because we are keeping to powers of 2), will equal 12x8=96 units. (watch the video, it explains this process a lot better then words can)
CREATE POINT OF REFERENCE
Create a point of reference where you curved surface will go down to.

TRIANGULATING CURVED ROAD
You have to triangulate your curved road if you want to have your curved road slope up/down.
If do not triangulate it, then it will not work.
Inside the editor it will appear correct, but when you compile your map, the curved sloped brush will not be smooth.
Use the Clip Tool and begin triangulating every single brush on your curved surface:

You will have to lower your grid, so every point of the Clip Tool is on the grid:

You should have something like this:

MOVING THE VERTICES
We now need to move each brushe's vertices down to meet the lower end of the road.
Select the brush, then click on the Vertex Mode. You may have to click on the Vertex Mode few times to get the vertices in all white.


Marquee select the first set. To marquee select, choose Move Tool, then in top view Left Click and Drag over a set of vertices. Once you have a template drawn out, click Enter.


Begin with the first set to meet the lower portion of the road:

Continue with the second set of vertices, raising them above the first set, 8 units.

Continue with each set of vertices:

Until you are left with a smooth curved road:

Make sure to turn your sloped curved road into func_detail. Select the road and press Ctrl+T:

180 DEGREE SLOPED CURVED ROAD
Simplest way to create 180 degree turn is to simply duplicate 90 degree curved sloped road we just created and reposition it to make 180 degrees.

Another way is to create 180 degree turn, and then follow the steps of triangulating and moving the vertices as we just did, but for a full 180 degree turn, instead of 90 degree turn.

EXAMPLES:
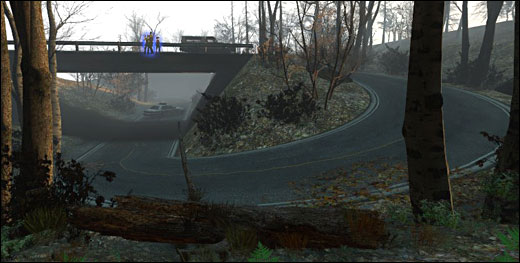
Here are some examples I created to show you what is possible when using these methods of creating curved sloped roads in Hammer:


Full 8-Part Roads Series with Hammer Source:1. Road Basics, Intersections and Adding Realism
3. Wide and Tight 90 Degree Turns
5. How to Create Curved, Sloped Roads
6. Brushes and Props - Blocking Roads Off
Home Terms of Use/Trademarks/Disclaimers Privacy Policy Donate About Contact
All content on this website is copyrighted ©2008-2024 World of Level Design LLC. All rights reserved.
Duplication and distribution is illegal and strictly prohibited.
World of Level Design LLC is an independent company. World of Level Design website, its tutorials and products are not endorsed, sponsored or approved by any mentioned companies on this website in any way. All content is based on my own personal experimentation, experience and opinion. World of Level Design™ and 11 Day Level Design™ are trademarks of AlexG.
Template powered by w3.css


 Maya Foundation: Home-Study Course - Model and UV Environments
 Substance 3D Painter Essentials - Master Texturing
 UE5: Fundamentals Vol.1 - Create with Unreal Engine 5
 UE5: Retro Office Project - Create Beautiful Interior Env
 UE5: Master Material Creation - Create Master Materials in UE5


