World of Level Design™
Tutorials to Becoming the Best Level Designer and Game Environment Artist (since 2008)
UE5: Crash Course Quick-Start Guide to Begin Using Unreal Engine 5 - TODAY
Category: UE5
April 18, 2023

The biggest frustration with UE5 is the "magnitude" of the engine.
It has so many tools, functions, parameters, editors and plugins. By the time you open the editor and ready to create, you are already overwhelmed by its complexity.
Before you try to create an environment or a game, you need to focus on the essentials of the engine. These include editor's interface, viewport navigation, using different viewport modes, project management, using the Content Browser, working with objects in the editor and creating very simple levels using Starter Content and much more. This is step 1.
This tutorial guide will give you the necessary steps to start using UE5 - TODAY.
Let's jump into it...
Video Tutorial
Download and Install UE5
First you need to download and install UE5.
Go to unrealengine.com/en-US/download and download Epic Games Launcher file and install it:

Epic Games Launcher is a hub of everything Unreal, which will include all versions of Unreal Engine for you to download.
Open Epic Games Launcher and register an account then log-in.

Inside the Epic Games Launcher go to Unreal Engine and Library tab:

Click the plus icon and choose UE5 version you want to download and install.


Then wait for it to download and install on your computer.
Create Your First Project
Before you can launch Unreal Engine editor you have to create a new project or open an existing project.
Let's create your first project.
Click on the Launch icon:

Unreal Project Browser will open. You will have a set of templates to choose from to create the project.

What do you want to use this project for? Select one: games, film and video and Live Events, architecture, automotive product design and manufacturing or simulation.
For this tutorial I'll will choose games.
Then you get to choose a template. A template will be preconfigured with some UE5 settings already enabled. It will also include some assets and gameplay elements to begin prototyping your game.
Blank project will not have any gameplay elements.
For this example I will use Third-Person Template.
Then you get to choose project defaults.

- Blueprint or C++. Choose blueprint. Blueprint is a visual scripting language inside Unreal Engine. It's a very powerful tool that allows you to script gameplay and create entire games using nothing else but blueprint. No programming C++ knowledge required.
- Target Platform: Desktop. Are you developing for a desktop or mobile?
- Desktop Quality Preset: Maximum. This is performance quality of your project.
- Include Starter Content. This will include a set of assets to use with your project. Such as textures, materials, static meshes, audio and more.
- Ray Tracing: on or off. Real-time ray tracing i a method of rendering that simulates the physical behavior of light. However real-time ray tracing requires a compatible DX12 video card. So if you video card doesn't support it, you can't use it For this example will keep it off.
Next, define project location. Where will your project be stored on your computer?
Then give a project name. Avoid dashes and spaces.
Click Create and UE5 editor for the project will open up.
Back in Epic Games Launcher, under Library and My Project section you will have a project show up.

You will be able to open this project back up anytime to continue working on it.
If you need to create a new project, repeat the steps.
Include Starter Content
When you create your first project, you should include Starter Content.
Starter content assets will give you a set of textures, materials static meshes (3D models), Blueprints, audio, particle effects to create with.

These assets are great to start with as you learn UE5.
You can include Starter Content during project creation screen:

Or you can add it into an existing project inside the Content Browser. Click on Add then go to Add Feature or Content Pack:

Then choose Starter Content and Add to Project:

Starter Content assets will be added into your project.
Start, Save, Open Levels
A map or a level is where you will create an environment where the player will play or the viewer will see.
When you first open UE5 editor you will be presented with a default level already opened inside the perspective viewport. This level will vary depending on the Game Template you are using. But you will have something opened as you launch the editor.

To open a new level go to File > New Level. You will be presented with few choices:

If you choose Basic, you will open a simple template level with all the actors or objects already set up for you to begin creating in. You will have all the necessary lights for exterior environment as well as a sky, fog, clouds and a ground plane.

If you want an empty, blank map with no actors or objects in it, choose Empty Level. You would have to insert all the necessary actors into yourself.
As you start with UE5, ignore using Open World or empty open world levels for right now.
To save an existing level, go to File > Save Current Level As, then choose a folder or create a new folder where you want to save your level. It will be saved inside your Content Browser. This level and all the actors or objects in it will be saved for you to reopen and continue working on.
To open an existing level, navigate to that level inside the Content Browser and double click on the icon to open it:

Or you can go to File > Open Level.
Interface Essentials
Let's cover the interface and all the panels/windows you need to know about to start using UE5.
The UE5 interface is very flexible. You can drag and rearrange any panels to customize your layout.
If you mess up the layout, you can reset it in Window > Load Layout > Default Editor Layout:

Viewports
Perspective view is the main view you'll be working in to create. But you can switch to 2x2 view with top, side, front and perspective view visible by going to Maximize/Restore Viewport:


There is also a shortcut to make your current viewport fill the entire screen and remove any menus you are seeing.
- F11 = Immersive Full Mode View
Top Tool Bar
At the very top you have the standard drop down menus you expect from most of the software.

You'll be able to access things like saving or opening maps, different editor windows, Build options and many more. Many of these you'll be using on a case-by-case basis. There is a lot here so we won't cover them all now.
Right below you have a toolbar:

The toolbar allows you to:
- Save your current level
- Choose editor modes (for example Landscape, Folaige or Modeling Modes)
- Quickly add different actors to project (similar to Place Actors panel)
- Blueprint menu
- Cinematics menu
- Play Testing your level or your game options
- Publishing your level/game options
Enabling any of the Editor Modes will open up an additional panel for that mode to be used and all the different tools contained within it.

Content Browser

Content Browser is your asset management panel. By default you won't see the content browser opened but you can toggle it using a shortcut key.
- Ctrl + Spacebar = Toggle Content Browser
You can dock the Content Browser by enabling Dock in Layout:

We'll cover more of the Content Browser in a later section.
Outliner
All available objects/actors inside your current level.

Details Panel
Details panel will show you all the properties for any selected object/actor inside your level.

World Settings
World Settings are properties that can be used to override Project Settings for the currently opened level. Such as game mode type, some lighting and rendering properties and many more.
You can access World Settings under Window > World Settings:

Place Actors Panel
The place actor panel gives you access to many actors that can be used to insert into your level such as lights, basic primitive meshes, visual effects actors and many more.

Go to Window > Place Actors to have it opened inside the Editor. I use this a lot.
You can also access a lot of these actors from Quickly add to the project drop done menu in the toolbar:

Settings
There are two different Settings menu options available inside the editor.
One is at the top right of the editor contains Project and Editor Settings:

Second settings menu is available in the Content Browser. This one is specific to the Content Browser settings and folder options:

Content Browser
Content Browser is your asset management system. It is where you'll find assets like Static Meshes (known as 3d models), textures, materials, particle effects, blueprints, audio and many more to be used within your levels.
In addition to using all these assets and inserting them into your level, you can import or create a lot of these inside the Content Browser.
You can toggle access to the Content Browser using the Ctrl + Spacebar.
You can then dock the Content Browser by enabling Dock in Layout:
You can filter the Content Browser to only show you specific assets inside it by clicking on this FIlter icon and enabling what you want to see:

To create new asset types, you simply Right Click inside the Content Browser and choose an asset type to create:

You can also use the Add icon within the Content Browser and do the same thing:

Content Browser is very important menu and you will be using this a lot.
Engine Content
Engine Content is a folder and a set of assets that always comes included with every UE5 project. By default this folder is hidden. You can enable its visibility and browse through its additional assets to use such as textures, static meshes, materials and much more.
To view Engine Content folder inside the Content Browser go to Settings and then enable Show Engine Content checkmark. For additional content, you can enable Show Plugin Content.

You can now navigate into the engine content folder and use assets within it.
Mastering Viewport Navigation
Here is everything you need for mastering UE5 navigation.
Perspective Viewport
- Hold RMB + Move Mouse = Look Around
- Hold LMB + Move Mouse = Move Forward/Back; Look Left/Right
- Hold MMB + Move Mouse = Pan Up/Down/Left/Right
- LMB + RMB + Move Mouse = Pan (Same as MMB + Drag)
- Mouse Wheel = Move Forward or Back
- Hold RMB + WASD = Move Forward/Back/Side-to-Side
- Hold RMB and Press Z or C = Zoom In/Out
- Hold RMB and Press Q or E = Move Camera Up/Down
Adjust camera movement speed in Perspective Viewport:

Maximize/restore viewports by clicking on the icon at the top right:
Shortcut Switching for Perspective/Side/Front/Top

- Alt + G = Perspective View
- Alt + H = Front View
- Alt + J = Top View
- Alt + K = Side View
These are my favorite shortcuts to switch views:
- Hold Ctrl + Middle Mouse Click Drag = Switch Views
- Hold Ctrl + Middle Mouse Click Drag UP = Top View
- Hold Ctrl + Middle Mouse Click Drag DOWN = Bottom View
- Hold Ctrl + Middle Mouse Click Drag LEFT = Back View
- Hold Ctrl + Middle Mouse Click Drag RIGHT = Front View
- Hold Ctrl + Middle Mouse Click Drag DIAGONAL BOTTOM LEFT = Perspective View
Orthographic Viewport
Orthographic views are your top, side, back, front views.

- Hold RMB + Move Mouse = Pan
- Hold LMB + Move Mouse = Marquee Selection
- Hold LMB + RMB and Move Mouse Forward/Back = Zoom In/Out
- Mouse Wheel + Drag = Zoom In/Out
- Hold Middle Mouse Click and Drag = Measuring Tool
Camera Bookmarks
Camera bookmarks allow you to set a camera position and comeback to them later. Inside the viewport, click on this icon at the top left (circle with 3 lines in it) and go down to Bookmarks:

There are shortcuts you can use instead of the drop down menu:
- Ctrl + 0, 1, 2, 3 etc. = Set Camera Bookmark
- 0, 1, 2, 3 etc. = Jump to Camera Bookmark
Working with Objects/Actors
An actor is any object that can be placed inside a level (mesh, audio, decal, volume, brush etc).
Here are some common ways to work with objects inside UE5.
- Left Click = Select Object
- Hold Shift + Left Mouse Button = Add to a Selection
- Hold Ctrl + Left Mouse Button = Add to or Remove from a Selection
- Hold LMB + Move Mouse = Marquee Selection in Orthographic Viewports
- Esc = Deselect Object or click off of that object
- Delete = Remove Selected Object
- Ctrl + Z = Undo
You may also use the Outliner to select objects:
When the object is selected, you will see properties for that object inside the Details Panel:
- F = Center View on Selected Object
- Hold Alt + Right Mouse Button = Move In/Out on Centered Object
- Hold Alt + Left Mouse Button = Rotate Around Centered Object
Move Object: left-click hold and drag on a specific axis in perspective and orthographic views.

Move, rotate and scale objects:
- W = Move
- E = Rotate
- R = Scale
- Q = Select
- Spacebar = Cycle Through Move, Rotate, Scale
You can also use the Detail Panel to move, rotate and scale or reset:

You can move an object inside the viewport without actively using the XYZ gizmo. To do this, select the object then:
- Hold Shift + Left Mouse Button = Move Along with the Object
- Hold Ctrl + Left Mouse Button = Move Object Along X
- Hold Ctrl + Right Mouse Button = Move Object Along Y
- Hold Ctrl + Left + Right Mouse Button = Move Object Along Z
Duplicate Objects:
- Ctrl + D = Duplicate
- Ctrl + C = Copy
- Ctrl + V = Paste
- Hold Alt + LMB = Duplicate
Using Static Meshes
Static Meshes are your 3D models. They have been created in external software such as Maya, 3ds Max, Blender then imported into UE5 or inside UE5's new Modeling Mode.
Almost all of environments you create will use Static Meshes. You will either have to create these Static Meshes yourself or download Static Meshes to use created by others.
Inside the Content Browser, you can filter by Static Meshes:

To use a Static Mesh, you simply Left-Click Hold and Drag from Content Browser into the level:

If you Double-Click on the Static Mesh inside the Content Browser, it will open Static Mesh Editor. This editor will define some important settings for that Static Mesh such as collisions, which material is going to use, level of detail and many more settings:

Difference Between Textures and Materials
There is a difference between textures and materials in UE5.
Textures are a single 2D file generated from an external software such as Photoshop, Substance, Gimp and imported into UE5. Some of these texture files are Color or Albedo, Normal Map, Roughness, Metallic, Displacement, various Masks and many others.
You cannot use textures directly in UE5, they have to be used within a Material.
Materials are made up of various textures in UE5.
Materials are a combination of many textures and various UE5 nodes or expressions that provide a result that you can use to apply onto your Static Meshes (3d models), characters and even landscapes.
Inside the Content Browser you can filter for Textures and Materials:

Double-Clicking on a texture will open up a Texture Editor:

Double-Clicking on the Material will open up a Material Editor:

You create Materials inside UE5's Content Browser. Right-click inside the empty space of Content Browser and choose Material or click on Add and choose Material:

You will often hear people say that they are texturing their environments, in UE5 this means they are generating and creating textures to be imported into UE5 where they will create materials to apply onto their geometry.
5 Light Types in UE5
There are 5 light types you can use in UE5.
- Directional Light: outdoor light, acts like a sun light and casts light into infinite distance. Only one of these should be in your level.
- Sky Light: used for illuminating indirectly lit areas of your environment, the shadows (requires a sky dome, sky atmosphere or HDRI image). Only one of these should be in your level.
- Point Light: acts like a light bulb, casts light in all direction from its source
- Spot Light: emits light in one direction, acting like a spot light
- Rect Light: emits light in rectangular surface in a single direction
You will find lights to use inside the Place Actors panel (Window > Place Actors):

Left-Click on any light and drag it into the level to place:

Inside the Details Panel, you'll be able to set many properties for that light such as color, radius, intensity and many more:

Working with Lights
Every environment you create can be lit 3 different ways:
- Static Lighting (Baked Lighting)
- Dynamic Lighting (Real-Time Lighting)
- Hybrid (Some lights are static, some are dynamic)
With new lighting system in UE5 called Lumen, you can now use fully dynamic lights with real-time Global Illumination.
What is Lumen?
Lumen is Unreal Engine 5's fully dynamic global illumination and reflections system
It's on by default in UE5 when you create a project. So it is already on and ready to be used right out of the box.
Existing projects converted from UE4 to UE5 will not automatically enable Lumen features. This prevents breaking or changing any lighting paths within those projects. Lumen is enabled from the Project Settings under the Rendering > Dynamic Global Illumination and Reflections categories. See this page if you need to enable Lumen manually.
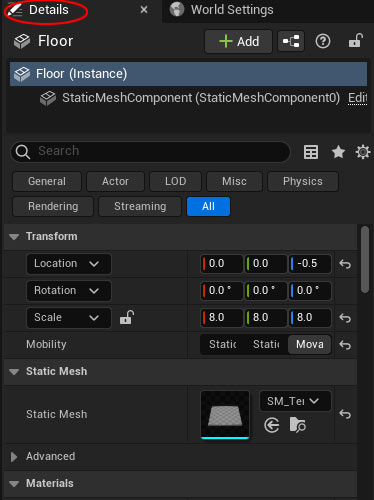
After placing a light into your level, you will be able to change every light to 3 different Mobility Light Types (Static, Stationary and Movable) inside the Details panel:
![]()
- Static: completely static lights that cannot be changed during gameplay
- Movable: fully dynamic lights that can change during gameplay
- Stationary: hybrid between static and dynamic light types. Can change some properties during gameplay, such as color or intensity but cannot be moved
For fully dynamic lighting and to use full power of Lumen, change your light Type to Movable (fully dynamic).
Play Test in Editor
Perspective viewport will be your main view to see how the level looks.
Two useful shortcuts for seeing your view as you would in-game:
- G = Game Mode
- Ctrl + R = Real Time
You can also access these commands through viewport icon (circle with 3 lines in it):

You can also play-test right inside the viewport or in new window using the toolbar by clicking on the 3-dots to set the Play Mode:

- Selected Viewport: will play in the active viewport
- New Editor Window: start play in editor in new window (ESC to exit)
- Stand Alone Game: starts the game in its own window and opens the level through the game menu (Alt + F4 = Exit Stand Alone Game)
- Simulate: simulate the game inside the active viewport, good for physics and Blueprints
Then press Play:

You can also Right-Click inside the viewport and choose Play From Here:

If you have a Player Start actor inside your level, you will spawn to play-test from that location. If you don't have a Player Start, you'll spawn right where your view is.
Insert a Player Start
Go to Place Actors panel and Basic tab, then drag the Player Start into your level:

Essential Beginner's Guide to Getting Started with UE5 Environment Creation
Now this was just an introduction to get you started with UE5.
There's a lot more that we need to cover for how to to use and create in UE5. Such as:
- Using different viewport options
- Architecture scale and dimensions
- Using Static Meshes to create environments with
- Using materials to texture your environment
- How to create custom static meshes using the modeling mode
- How to light Exteriors
- How to light Interiors
- How to use atmosphere actors such as Sky Atmosphere and Exponential Height Fog
- and much more
You can learn all this and more in this 11+ hour "UE5 Fundamentals Vol.1" tutorial course.
Download the UE5 Fundamentals Vol.1 Tutorial Course...


SUBSCRIBE & GET FREE UE5 PDF GUIDE
Subscribe to receive NEW/UPDATED and FREE "UE5 Beginner's Quick Start Guide" PDF (90 pages).

Visit this page for more info about the guide...
TOP 7 TUTORIAL COURSES FOR 2026
 Modular Environment Design Masterclass Tutorial Course
 Maya Foundation: Home-Study Course - Model and UV Environments
 Substance 3D Painter Essentials - Master Texturing
 UE5: Fundamentals Vol.1 - Create with Unreal Engine 5
 UE5: Retro Office Project - Create Beautiful Interior Env
 UE5: Master Material Creation - Create Master Materials in UE5
 Preproduction Blueprint: Plan Environments and Level Designs
TUTORIAL CATEGORIES
UE5 FUNDAMENTALS VOL.1 COURSE

UE5: RETRO OFFICE PROJECT

MODULAR ENVIRONMENTS MASTERCLASS

LEARN THE PREPRODUCTION PROCESS

ABOUT WoLD & ALEXG

My name is AlexG. I am self-taught level designer, game environment artist and the creator of World of Level Design.com. I've learned everything I know from personal experimentation and decades of being around various online communities of fellow environment artist and level designers. On World of Level Design you will find tutorials to make you become the best level designer and game environment artist.
Home Terms of Use/Trademarks/Disclaimers Privacy Policy Donate About Contact
All content on this website is copyrighted ©2008-2024 World of Level Design LLC. All rights reserved.
Duplication and distribution is illegal and strictly prohibited.
World of Level Design LLC is an independent company. World of Level Design website, its tutorials and products are not endorsed, sponsored or approved by any mentioned companies on this website in any way. All content is based on my own personal experimentation, experience and opinion. World of Level Design™ and 11 Day Level Design™ are trademarks of AlexG.
Template powered by w3.css