World of Level Design™
Tutorials to Becoming the Best Level Designer and Game Environment Artist (since 2008)
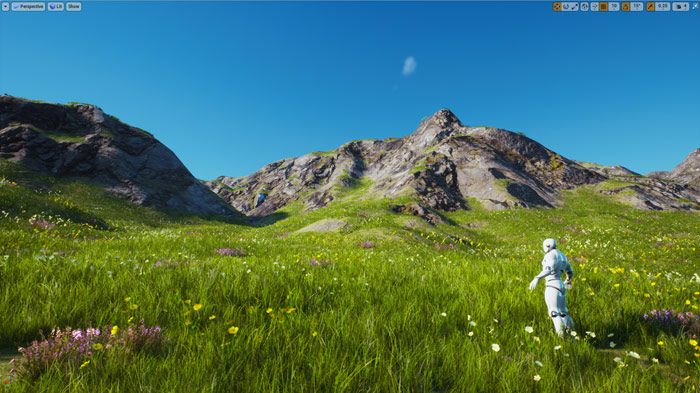
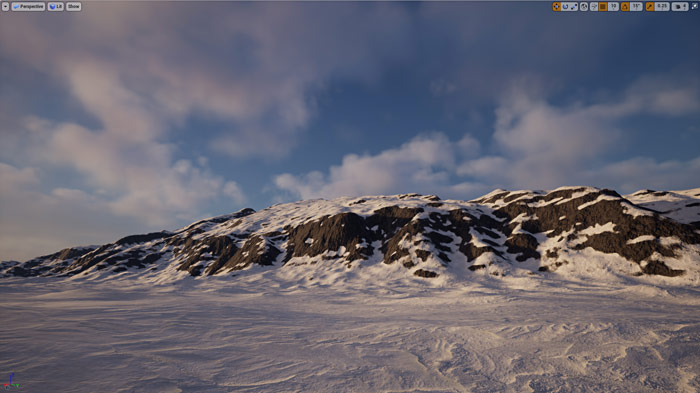
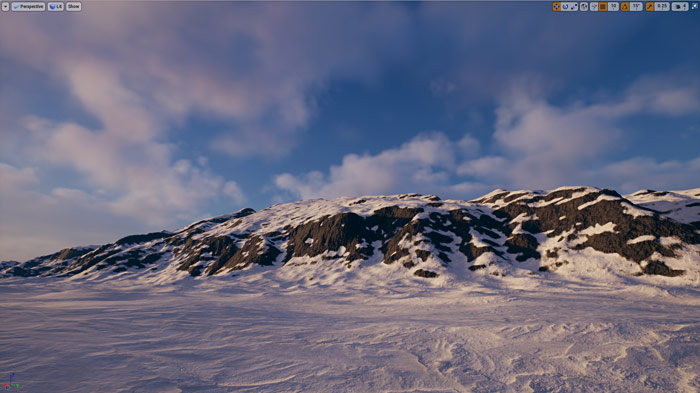
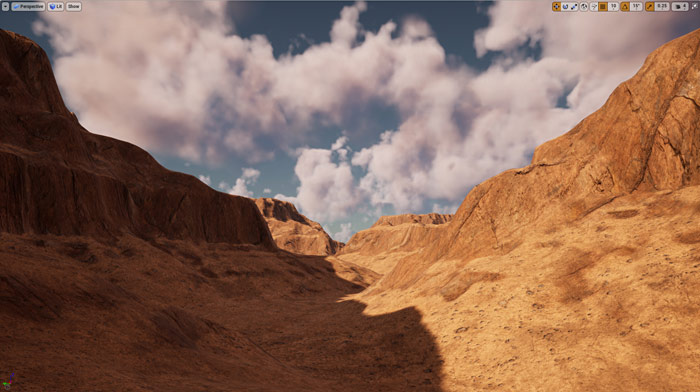
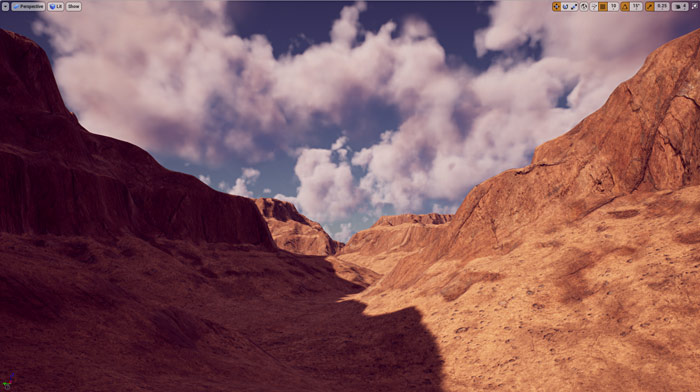
UE4 Environment Breakdown: How I Created These Landscape Environments in Just Few Hours
Category: Environment Art, UE4
March 16, 2021

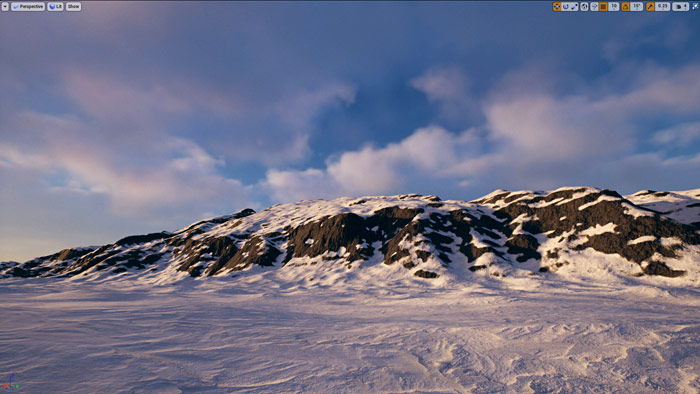
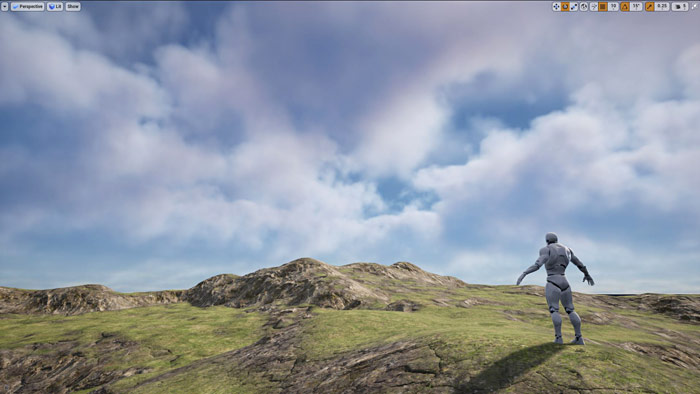
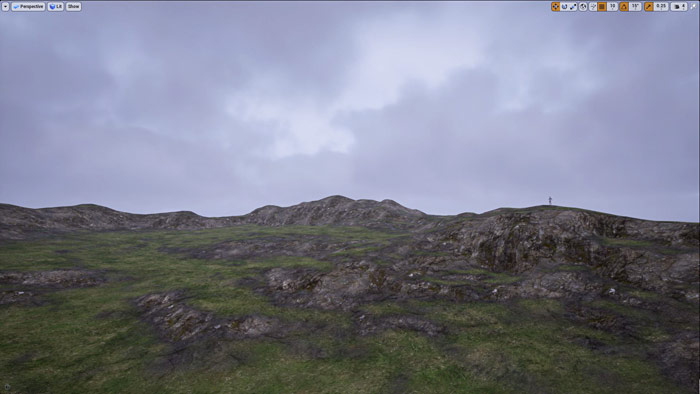
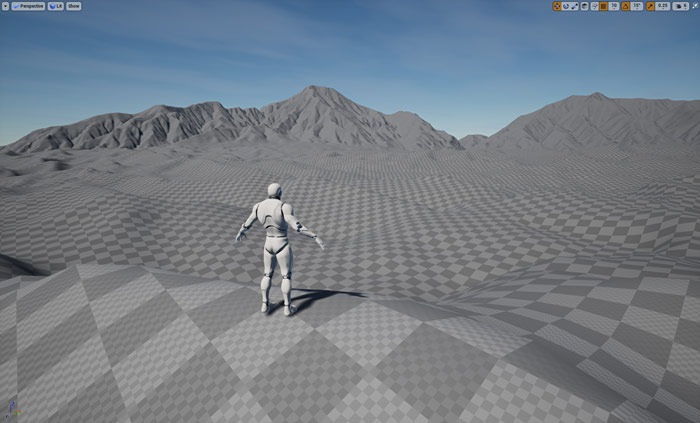
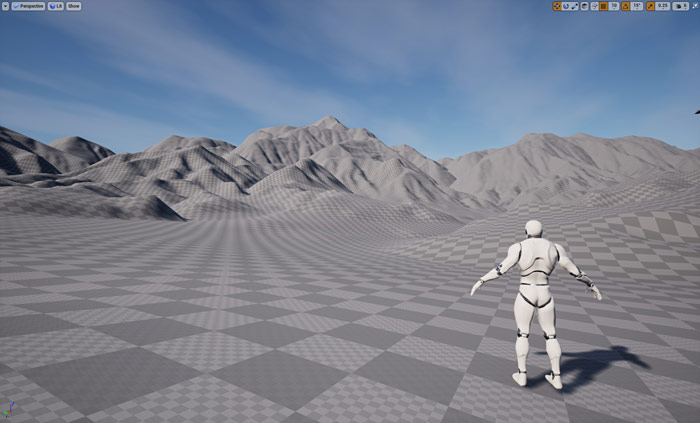
Over the last few months I've created a set of landscape environments entirely in UE4.
I didn't use any paid software to generate heightmaps, nothing bought from the Marketplace, no engine modifications and all were done in just few hours.
Here are some screenshots:


In this breakdown I will show you what I did and link to all the tutorials I've published of how I created these landscape environments so you can do the same.
Workflow
Here are workflow steps I used to create all these landscape environments.
- Generate heightmaps
- Create one master Landscape Material and make Material Instances from it (one for each landscape)
- Apply Material Instances onto landscapes and change Material Instance properties until the terrain looked how I want it
- Change Lighting (Directional Light and Sky Light)
- Change Sky Atmosphere properties
- Change Volumetric Clouds
- Adjust Post Process
As you can see, not a lot of steps and all are rather simple and sequential. I did this for every single landscape level.
3 Steps in Landscapes for UE4
There are 3 primary phases in creating landscapes for Unreal Engine 4.
- You need a heightmap
- You need a landscape material
- You need to spawn foliage
For each phase you have an option of doing it manually or procedural.
Manual approach for large landscapes takes too much time. So we are left with procedural approach.
The terrain heightmap, the landscape material and foliage - all work automatically. All I had to do was set up the rules for their appearance.
Terrain Heightmaps
Sculpting the heightmap manually would take a long time. It's possible but there is no reason to do so, especially for landscapes that are kilometers in size.
I used Terrain.Party to generate all heightmaps and imported them into UE4. See this tutorial: UE4 Secrets to Generating Real-World Heightmaps from Terrain.Party for UE4.
I generated a lot of heightmaps from different parts of the world to mimic the environment setting I was trying to create.
Here are some of them without any materials, lighting or post process applied:
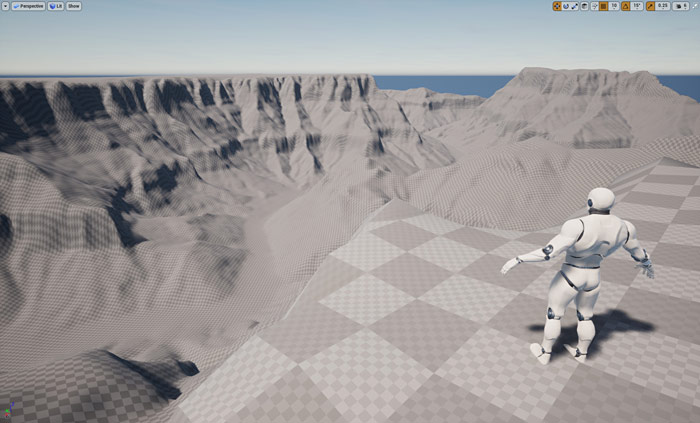
All heightmaps were untextured so I needed to create a landscape material to use.
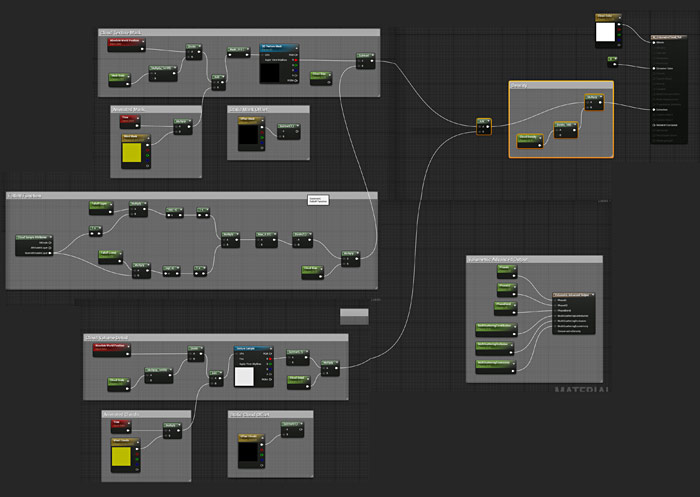
Landscape Materials
For all landscapes I used Auto-Landscape Material.
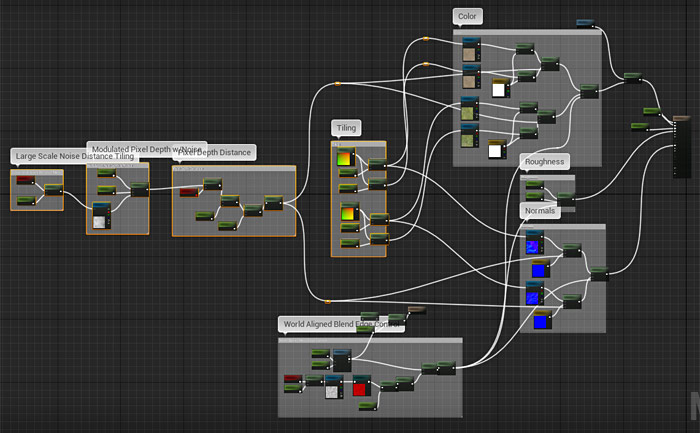
Using Auto-Landscape Materials for large terrains is a must for any open-world environments. It will let you automatically texture landscapes based on the slope (angle) of the terrain.
Auto-Landscape Material is a material with a set of rules that controls at which angle of the terrain a landscape texture will appear. When you apply auto-material on the landscape, it textures the entire terrain automatically and will change the texture based on slope/angle. You don't even need to create texture layers. You simply create the auto-landscape material, define the rules and apply the material on the terrain. You landscape is now textured.
I did this for all the landscape levels I created.
I created one master Auto-Landscape Material then created Material Instances from it. I then applied different Material Instances onto landscapes and adjusted the parameters to make them work on each terrain. This allowed me to change textures and other parameters for each of the terrains.
For more of Auto-Landscape Material breakdown, see these 3 tutorials:
- UE4: Automatically Texture HUGE Landscapes with Auto-Landscape Materials
- UE4: How to Create Your First Auto-Landscape Material
- UE4: 9 Things Every Auto-Landscape Material Must Have
For complete Auto-Landscape Material system and how-to you'll need this tutorial course: UE4: Complete Guide to Auto-Landscape Materials.
Textures Used in Landscape Materials
I created various landscapes that included grass, rock, dirt, snow and sand surfaces. So to get these textures I used Quixel Bridge. All downloaded textures included an albedo, normal map, roughness and so on. I used these textures as part of my landscape material.
Learn how to use Quixel Bridge for UE4 here.
Lighting
Every single landscape level uses dynamic lighting setup with the following actors:
- Directional Light: this is your sunlight.
- Sky Light: the bounced light from the sky which illuminates non-directly lit areas (areas in shadows).
- Sky Atmosphere: creates the sky and scattering of light through the atmosphere.
- Volumetric Cloud: creates dynamic cloud volumes in the sky that realistically behave and scatter light through them.
- Exponential Height Fog: adds additional fog effect into the level (optional).
- Post Process Volume: in this situation I use Post Process Volume to control Exposure in the scene (also known as Eye Adaptation).
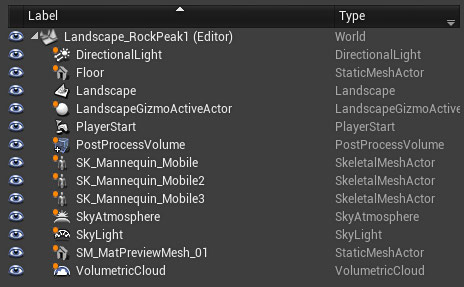
I've changed various properties of every lighting actor depending on the scene.
Exponential Height Fog use is optional because Sky Atmosphere can render its own fog but I've found using Height Fog helps to add additional fog effect that is easier to control and work with.
I highly recommend taking a look at this more in-depth tutorial of what each actor does and how to work with them: UE4 Recreate the Dynamic Time of Day Template Level - Why You Should and How-To.
For all the landscape environments I used Temperature settings for light color. This gave me a more realistic and consistent lighting color across variety of levels.
All you do is enable Use Temperature under Directional Light, change Temperature value and adjust Intensity:
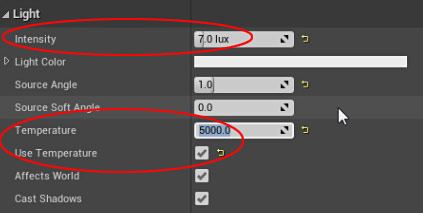
Use Temperature values from this chart:

Volumetric Clouds
I am using a self-created Volumetric Cloud material for the clouds.
If you don't know what Volumetric Clouds are then take a look at this tutorial: UE4 Analysis of Volumetric Clouds and How to Use Them.
"The Volumetric Cloud is a physically-based cloud rendering system that uses a material-driven approach to give artists and designers the freedom to create any type of clouds they need for their projects. The cloud system handles dynamic time-of-day setups that is complemented by the Sky Atmosphere and Sky Light using the real time capture mode. The system provides scalable, artist-defined clouds that can adapt to projects using ground views, flying, and ground to outer space transitions." - Source
Using Volumetric Clouds is simple but setting up your own material wasn't. I spent few weeks of learning everything I could how to do so and I was finally able to create one.
I created one master Volumetric Cloud Material then created various Material Instances that I used for different landscape environments.
I created a step-by-step tutorial for how to create your own Volumetric Clouds in UE4 which will give you a better result than the default that comes with Volumetric Cloud actor. And that is what I used in all the landscape environments.
Overcast Lighting
Some landscape environments have overcast lighting. I love overcast lighting because of the very distinctive atmospheric mood it creates - melancholy, somber, emotional, quiet and desolate.
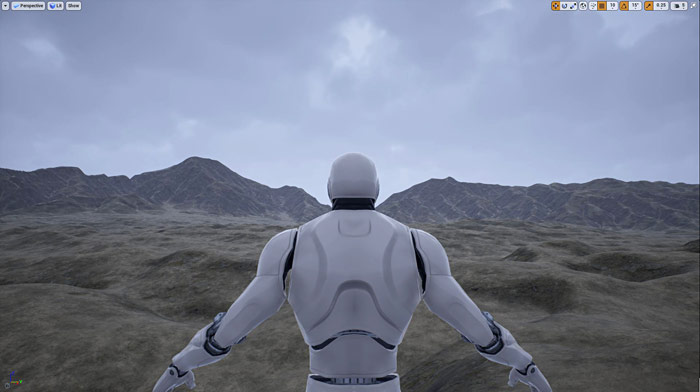
To get overcast lighting in your environments, you need to increase Mie Scattering Scale under Sky Atmosphere above the value of 1, often more.
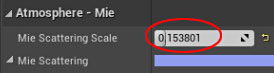
There are more properties you need to change and you can learn more about it in this tutorial: UE4 - Create Overcast Day Lighting with Sky Atmosphere.
Post Process
I already had Post Process Volume inserted to control Exposure in every level but now at the end of the project I needed to adjust Color Grading.
Color Grading allows you to change colors, saturation, white balance, contrast, shadows, midtones, highlights etc. in the entire environment.
You always want to do this last, after you've gotten everything you can out of your lighting actors.
For each level I changed Global Settings of Color Grading:
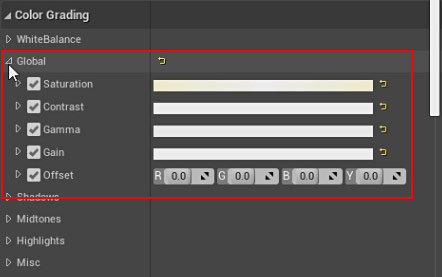
The amount to be adjusted varies based on the visual look you are trying to achieve.
Here are some before/after:

Next Tutorial
UE4: Auto-Landscape Material - Tutorial Course

Download the tutorial course here: "UE4: Auto-Landscape Material: The Complete Course to Creating and Using Procedural Auto-Landscape Materials"

SUBSCRIBE & GET FREE UE5 PDF GUIDE
Subscribe to receive NEW/UPDATED and FREE "UE5 Beginner's Quick Start Guide" PDF (90 pages).

Visit this page for more info about the guide...
TOP 7 TUTORIAL COURSES FOR 2026
 Modular Environment Design Masterclass Tutorial Course
 Maya Foundation: Home-Study Course - Model and UV Environments
 Substance 3D Painter Essentials - Master Texturing
 UE5: Fundamentals Vol.1 - Create with Unreal Engine 5
 UE5: Retro Office Project - Create Beautiful Interior Env
 UE5: Master Material Creation - Create Master Materials in UE5
 Preproduction Blueprint: Plan Environments and Level Designs
TUTORIAL CATEGORIES
UE5 FUNDAMENTALS VOL.1 COURSE

UE5: RETRO OFFICE PROJECT

MODULAR ENVIRONMENTS MASTERCLASS

LEARN THE PREPRODUCTION PROCESS

ABOUT WoLD & ALEXG

My name is AlexG. I am self-taught level designer, game environment artist and the creator of World of Level Design.com. I've learned everything I know from personal experimentation and decades of being around various online communities of fellow environment artist and level designers. On World of Level Design you will find tutorials to make you become the best level designer and game environment artist.
Home Terms of Use/Trademarks/Disclaimers Privacy Policy Donate About Contact
All content on this website is copyrighted ©2008-2024 World of Level Design LLC. All rights reserved.
Duplication and distribution is illegal and strictly prohibited.
World of Level Design LLC is an independent company. World of Level Design website, its tutorials and products are not endorsed, sponsored or approved by any mentioned companies on this website in any way. All content is based on my own personal experimentation, experience and opinion. World of Level Design™ and 11 Day Level Design™ are trademarks of AlexG.
Template powered by w3.css