World of Level Design™
Tutorials to Becoming the Best Level Designer and Game Environment Artist (since 2008)

Material Editor is an important element of UDK environment creation. It is where you will create and edit materials that will be used to texture your environment.
Before we get started I want to make sure you understand the Difference Between Textures and Materials in UDK.
In this tutorial you'll learn the basics of Material Editor such as:
- How to access the Material Editor
- How to navigate around the interface
- Using Preview Window
- Applying Changes to Original Material
This is an introduction to UDK Material Editor before we get into more detail on how to import your own textures and create your own materials.
Opening Material Editor
You can access the Material Editor through the Content Browser by:
- Opening already created Materials
- Creating a New Material
To Open Existing Materials:
Open Content Browser:

Filter by Materials and double-click on any material to open the Material Editor for that particular Material:

Creating New Materials
To create a new material, see this tutorial (coming soon).
Material Editor Interface
The interface of the material editor is simple.
Any given material consists of variety of expressions to create what you see in level. In the preview window you get to see what this material looks like as you are working on it. As you add nodes, change properties and use textures, the preview window will show you updates of what the material will look like in real-time.
Preview Window Navigation

- Right Mouse Button + Drag = Zoom In and Out
- Left Mouse Button + Drag = Look Around
- Middle Mouse Button + Drag = Pan Camera
- Press/Hold L key and Move the Mouse = changes the position of the light. Allows you to move the light and see the object lit at different angles.
Apply Changes to Original Material
Any time you make a change in the material and in order to see changes in the level, you must save that material by clicking on the check box at top left 'Apply Changes to Original Material'. This compiles and saves that material. You will also be asked to save when you exit the Material Editor.

Changing Preview Shape
To change the shape in the Preview Window display, click on the Cylinder, Cube, Sphere or Plane in the toolbar.

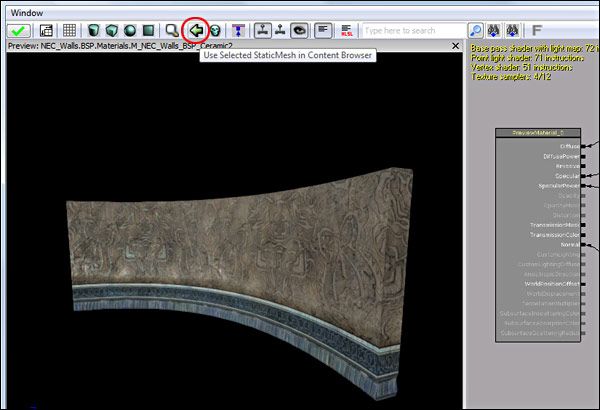
Sometimes you may want to see the preview on the actual Static Mesh you are using this material on.
Step 1: Content Browser and find the Static Mesh you want to use:
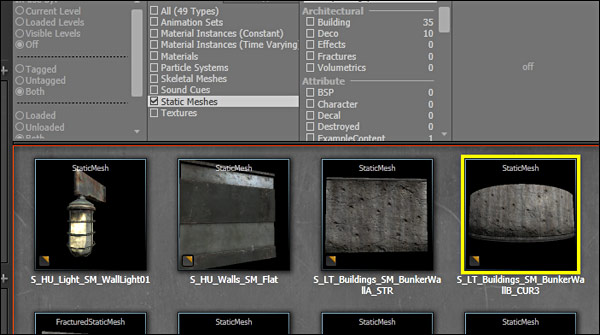
Step 2: Select the static mesh in the Content Browser.
Step 3: Back in Material Editor click on 'Use Selected Static Mesh in the Content Browser':
Material Expression Graph
This is the main working area. Here you will add expressions and create the structure of your material.

Main Window (Material Expression Graph) Navigation
- Left or Right Mouse Button + Drag = Pan Around
- Left + Right Mouse Button + Drag = Zooms In and Out
- Mouse Wheel = Zooms In and Out
Expression List: Right Clicking will open up Expression List. You can also access the same list in the right hand side of Material Editor.

Expression Properties Panel: Left Clicking on any node will select that expression and display the Properties Window Panel on the bottom, that will change depending on which node you are selecting.

Material Properties Panel: You can also Left Click on the main Material node. Here you will be able to change properties for the entire material. This property window will also always be open if you have nothing selected.

Find Object in Content Browser: To find the texture that is being used for a node, select the TextureSample node and clicking on the magnifying glass in the Properties Panel. This will open the Content Browser and select the texture being used for this material for that node.


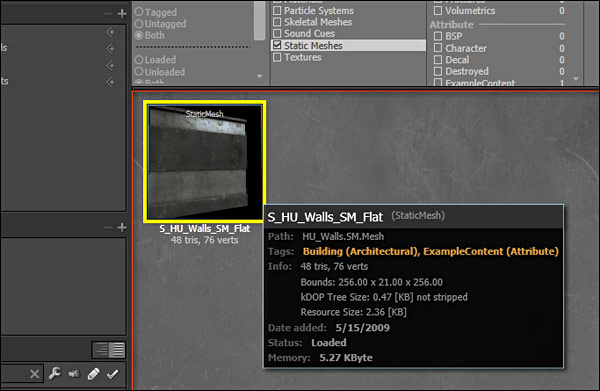
Find Material in Content Browser From Static Mesh: You can also find the material in the Content Browser on any mesh. By double clicking on the Static Mesh in the Content Browser:
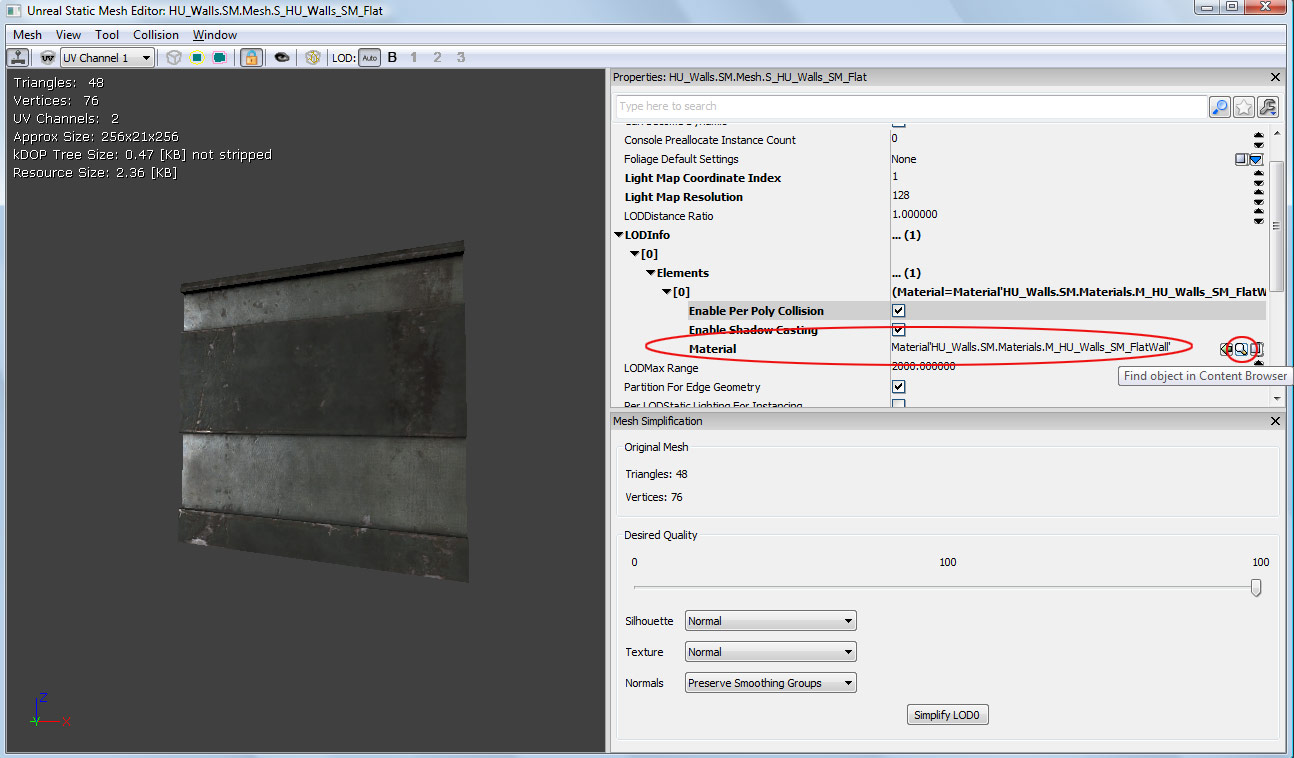
You open Static Mesh Editor, click on the magnifying glass under Material to find that Material in the Content Browser.
Click on Image for Larger View
Material Editor Window Panels: If you ever close any of the panels in the Material Editor, you can bring them back by going up to Window Menu Bar at the top editor and selecting the panel you want to display.

Click on Image for Larger View
Related Tutorials:

SUBSCRIBE & GET FREE UE5 PDF GUIDE
Subscribe to receive NEW/UPDATED and FREE "UE5 Beginner's Quick Start Guide" PDF (90 pages).

Visit this page for more info about the guide...
TOP 7 TUTORIAL COURSES FOR 2026
 Modular Environment Design Masterclass Tutorial Course
 Maya Foundation: Home-Study Course - Model and UV Environments
 Substance 3D Painter Essentials - Master Texturing
 UE5: Fundamentals Vol.1 - Create with Unreal Engine 5
 UE5: Retro Office Project - Create Beautiful Interior Env
 UE5: Master Material Creation - Create Master Materials in UE5
 Preproduction Blueprint: Plan Environments and Level Designs
TUTORIAL CATEGORIES
UE5 FUNDAMENTALS VOL.1 COURSE

UE5: RETRO OFFICE PROJECT

MODULAR ENVIRONMENTS MASTERCLASS

LEARN THE PREPRODUCTION PROCESS

ABOUT WoLD & ALEXG

My name is AlexG. I am self-taught level designer, game environment artist and the creator of World of Level Design.com. I've learned everything I know from personal experimentation and decades of being around various online communities of fellow environment artist and level designers. On World of Level Design you will find tutorials to make you become the best level designer and game environment artist.
Home Terms of Use/Trademarks/Disclaimers Privacy Policy Donate About Contact
All content on this website is copyrighted ©2008-2024 World of Level Design LLC. All rights reserved.
Duplication and distribution is illegal and strictly prohibited.
World of Level Design LLC is an independent company. World of Level Design website, its tutorials and products are not endorsed, sponsored or approved by any mentioned companies on this website in any way. All content is based on my own personal experimentation, experience and opinion. World of Level Design™ and 11 Day Level Design™ are trademarks of AlexG.
Template powered by w3.css