World of Level Design™
Tutorials to Becoming the Best Level Designer and Game Environment Artist (since 2008)
UDPATE: This tutorial has been UPDATED with a new version - UDK: 22 Steps to Getting Started with UDK (in Less Than 30 Minutes)

UDK Basics covers the most essential tools and functions you need to know to get started with UDK. You'll be able to quickly jump into UDK and begin feeling comfortable using the most commonly used functions. UDK beginner tutorials.
UDK Basics Getting Started in 11 Steps Part 1/3
UDK Basics Getting Started in 11 Steps Part 2/3
UDK Basics Getting Started in 11 Steps Part 3/3
Note: UDK March 2010 was used in this tutorial. Some functions have changed, but the general ideas of the tutorial still apply. Principles are the same.
Click here to watch new updated version of this tutorial.
In UDK Basics Part 3/3 you'll learn:
- UDK Scale and Proportions
- Grid Snaps
- Various Viewport Options
9. UNREAL SCALE AND PROPORTIONS
The scale of a character in Unreal is 96 units.
- 128 UU = 8 feet = 243.8 cm
- 96 UU = 6 feet = 182.9 cm
- 16 UU = 1 foot = 30.5 cm
- 1 UU = 2cm
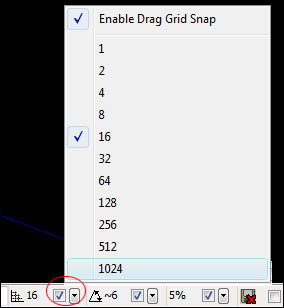
10. GRID SNAPPING
Grid snapping is extremely important. Always work with grid snaps turned on. There are 3 grid snap options. Rotation, Drag and Scale Grid.
On the bottom right corner you have Drag Grid Option and Rotation Grid Option, Scale Grid.
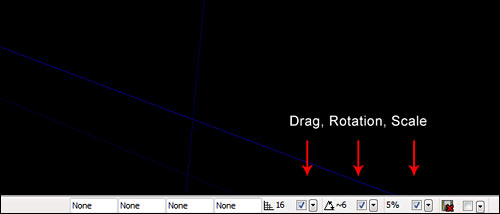
Uncheck/check: turns on/off the drag/rotation/scale grids. I would recommend to always have this on. In some cases for fine detail work you may need to turn it off.
- [ ] Bracket keys, increase/decrease grid
11. VIEWPORT OPTIONS
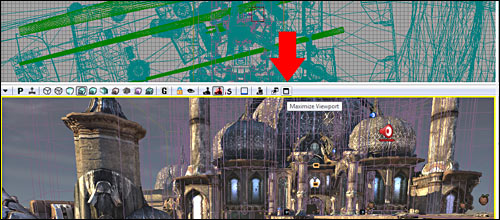
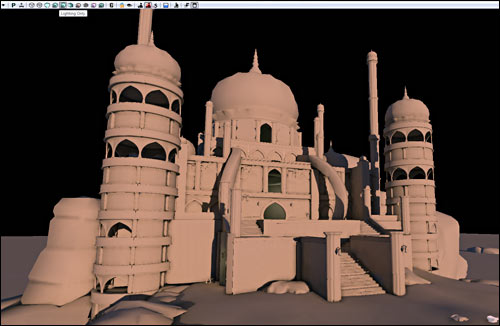
Most commonly used viewport is perspective. You will spend the most time in perspective viewport. That includes moving, placing, duplicating and transformation of static meshes and most of your environment creation.
If you go up to View and Under Viewport Configuration you have options of how you want to set up your views.
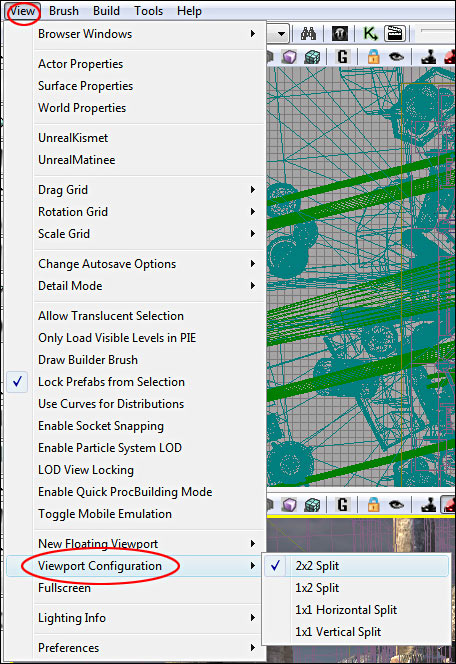
In the drop down menu for the viewport there are options of what you want to display inside you viewport in the moment. It allows you to hide/unhide specific elements in your perspective viewport. Very useful when you are working on specific element during your level creation.
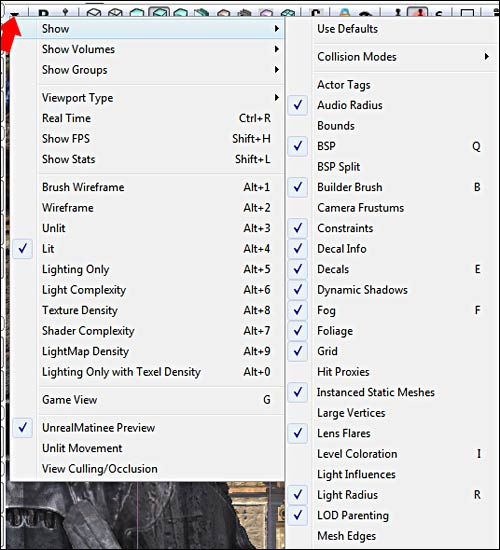
RTP (Real Time Preview) shows the environment, as it would look like in game, complete with sound and particle effects. Real Time Preview works best when you have Game Mode enabled (G), which turns off wireframe brush view. This offers the best and most accurate view of what your level will look like in game.

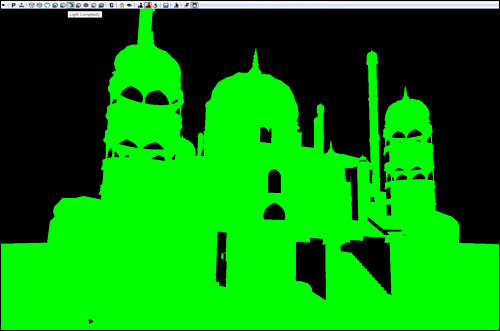
Brush Wireframe (Alt+1): shows wireframe brushes:
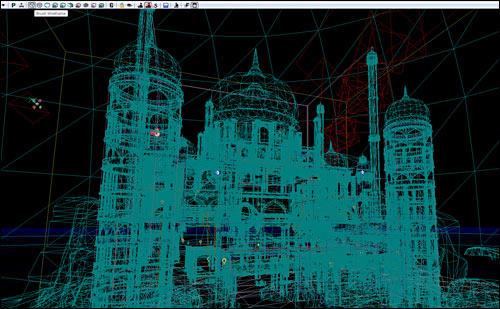
Wireframe (Alt+2): shows wireframe, will not allow brush selection:

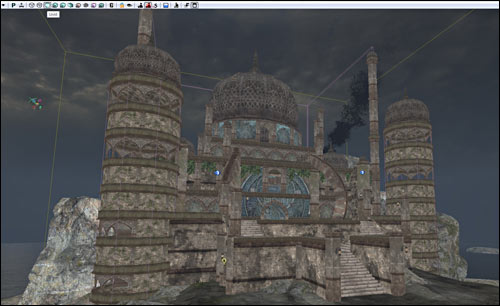
Unlit (Alt+3): no lights, makes navigation inside your perspective viewport a bit faster:
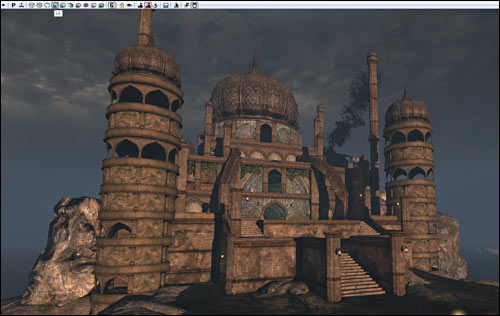
Lit (Alt+4): full lights preview:
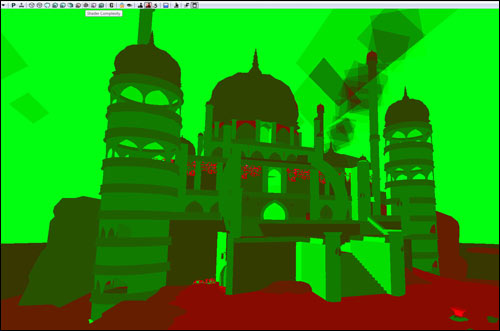
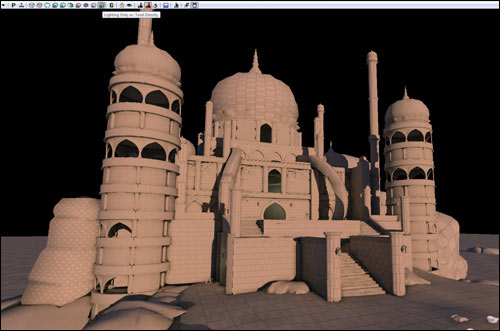
Lighting Only (Alt+5): lighting only:
Lighting Complexity (Alt+6): your lighting complexity:
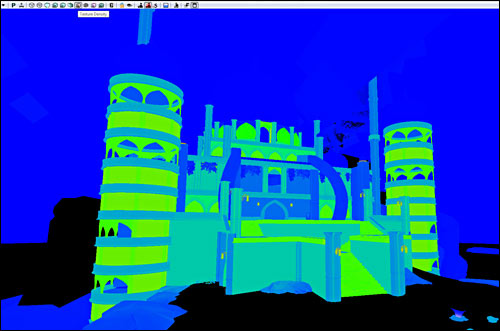
Texture Density (Alt+7): how complex are your textures:
Shader Complexity (Alt+8):
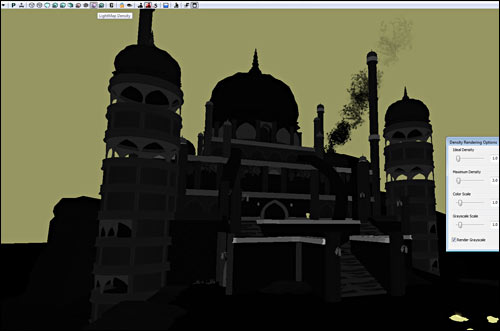
Lightmap Density (Alt+9):
Lighting only with Texel Density (Alt+0):
UDK Basics Getting Started in 11 Steps Part 1/3
UDK Basics Getting Started in 11 Steps Part 2/3
UDK Basics Getting Started in 11 Steps Part 3/3
Note: UDK March 2010 was used in this tutorial. Some functions have changed, but the general ideas of the tutorial still apply. Principles are the same.

SUBSCRIBE & GET FREE UE5 PDF GUIDE
Subscribe to receive NEW/UPDATED and FREE "UE5 Beginner's Quick Start Guide" PDF (90 pages).

Visit this page for more info about the guide...
TOP 5 TUTORIAL COURSES FOR 2026
 Maya Foundation: Home-Study Course - Model and UV Environments
 Substance 3D Painter Essentials - Master Texturing
 UE5: Fundamentals Vol.1 - Create with Unreal Engine 5
 UE5: Retro Office Project - Create Beautiful Interior Env
 UE5: Master Material Creation - Create Master Materials in UE5
TUTORIAL CATEGORIES
UE5 FUNDAMENTALS VOL.1 COURSE

UE5: RETRO OFFICE PROJECT

LEARN THE PREPRODUCTION PROCESS

ABOUT WoLD & ALEXG

My name is AlexG. I am self-taught level designer, game environment artist and the creator of World of Level Design.com. I've learned everything I know from personal experimentation and decades of being around various online communities of fellow environment artist and level designers. On World of Level Design you will find tutorials to make you become the best level designer and game environment artist.
Home Terms of Use/Trademarks/Disclaimers Privacy Policy Donate About Contact
All content on this website is copyrighted ©2008-2024 World of Level Design LLC. All rights reserved.
Duplication and distribution is illegal and strictly prohibited.
World of Level Design LLC is an independent company. World of Level Design website, its tutorials and products are not endorsed, sponsored or approved by any mentioned companies on this website in any way. All content is based on my own personal experimentation, experience and opinion. World of Level Design™ and 11 Day Level Design™ are trademarks of AlexG.
Template powered by w3.css