World of Level Design™
Tutorials to Becoming the Best Level Designer and Game Environment Artist (since 2008)
UDK: 22 Steps to Getting Started with UDK - Updated (in Less Than 30 Minutes)
Category: UDK
December 01, 2014

In this tutorial you will learn everything you need to know in order to get started with UDK.
I've narrowed down this process to the core essentials in 22 steps. Best part, this will only take you 30 minutes to complete.
This tutorial is the updated version of "UDK Basics Getting Started in 11 Steps Parts 1-3" that were released in 2010.
Free PDF Tutorial Guide Download: The Essential Beginner's Guide to Getting Started with UDK
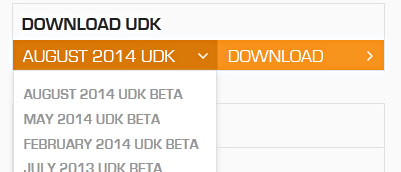
STEP 01: How to Download, Install, Launch UDK
UPDATE: UDK Downloads are no longer available from Epic Games.
However, someone compiled a list of available download links here on the forums. I can't vouch for their validity but they are available for you to try.
Go through the process of installing and Launching UDK:
- Double click on the downloaded UDK.exe installer
- Choose 'UT Sample Game'
- Choose Install Location - keep this default on C: drive
- Click Install
- Choose Extras - "Perforce is revision control system, which helps you collaborate with team members, manage multiple versions of your project and help you back up your work". I personally did not install Perforce. I back up my own work and most of my projects are solo projects.
- Click Next
- Choose Launch UDK
STEP 02: Start with Map Templates or New Blank Map
You have 2 options when you start your map in UDK.
1. Use available map templates that comes with UDK. This template contains all the necessary assets already inserted to start creating your world. Such as skybox, ground plane, light, fog, Lightmass Importance Volume and player start.
2. Start a blank new map that is completely empty.
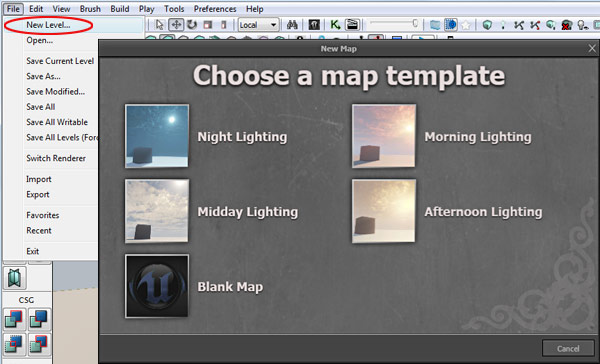
- To access all available templates go to File --> New Level and choose a template
- To start a blank new map, go to File --> New Level and choose Blank Map
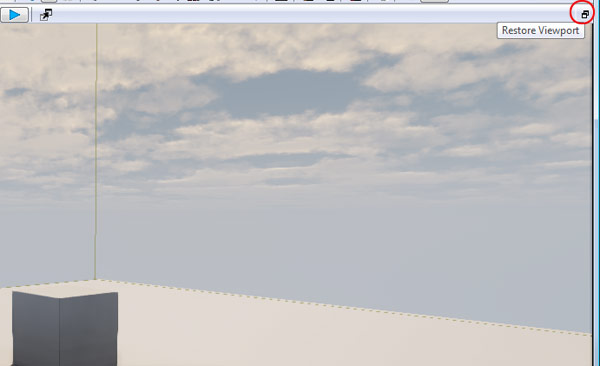
STEP 03: Viewports Workflow
Main working window is Perspective Viewport. To view 3 orthographic viewports - Top, Side and Front click on Restore Viewport icon at top right corner of the Perspective Viewport:
Use a shortcut key:
- Alt+X = Maximize/Restore Active Viewport
To make a viewport active, simply left click within a viewport to see yellow outline, then use Alt+X to maximize that viewport.
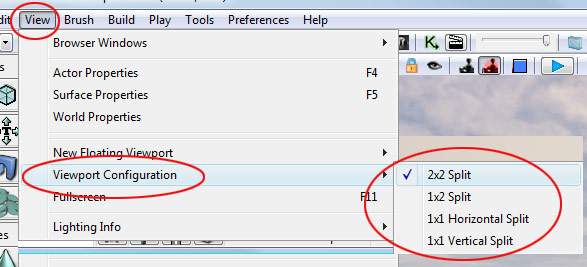
To change viewport configuration to something other than 2x2, go to View --> Viewport Configuration and choose from any of the available options such as 2x2 split, 1x2 split, 1x1 horizontal split or 1x1 vertical split.
STEP 04: How to Navigate Around Viewports
To navigate around in the viewports.
Perspective Viewport:
- W and S = Move Forward and Back
- A and D = Move Left and Right (Strafe)
- Hold Right Mouse Button and Move = Look Around
- Hold Left Mouse Button and Move = Move Forward and Back
- Hold Right+Left Mouse Buttons and Move = Move Up/Down/Side-to-Side
Orthographic Viewports (Top, Side, Front):
- Hold Right or Left Mouse Button and Move = Pan Around (Orthographic Viewports)
- Hold Right+Left Mouse Buttons and Move = Zoom In/Out (Orthographic Viewports)
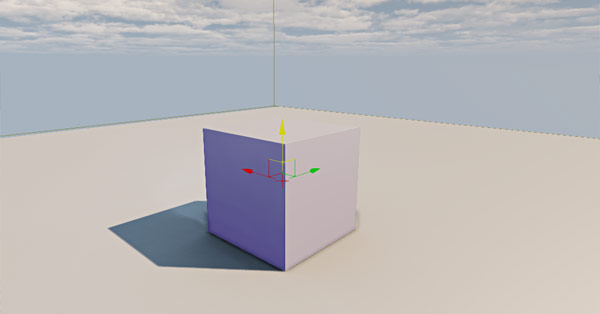
STEP 05: Object Selection and Manipulation (Move, Rotate, Scale)
Left Click on any object to select it.
- Spacebar = Cycle Through Move/Rotate/Scale Gizmo for Selected Object.
Left click and drag on the XYZ axis gizmo to move, rotate or scale that object.
- Hit Delete to delete that object
- Hold Alt+Left Mouse Click/Drag = Duplicate Object
STEP 06: Static Meshes vs BSP
BSP are brushes that are created inside UDK. These are basic geometric shapes that are used to block in a level and to create large simple geometry such as floors, walls and ceiling.
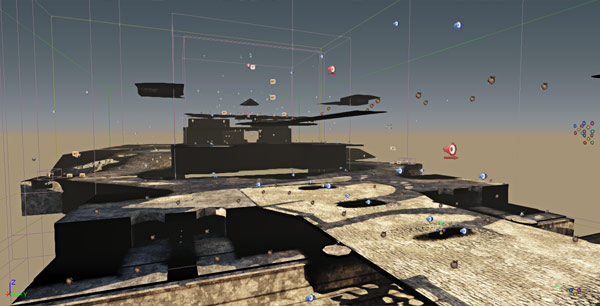
BSP Brushes only, no Static Meshes
Static Meshes are 3d models that are created inside a 3d application (Maya, 3dsMax, Modo, Blender etc) and then imported into UDK.
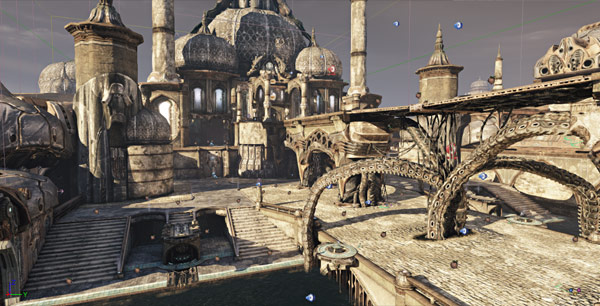
Static Meshes and BSP Brushes
Basic workflow in UDK is:
- Use BSP brushes to block in a level layout
- The BSP shapes are kept very simple
- Once the spacing and layout has been created with BSP brushes begin to replace these brushes with Static Meshes (3d models)
BSP Brushes is what you will be using to block in the layout and judge spacing before replacing them with Static Meshes.
Static Meshes is what you will be using most of the time when constructing game environments in UDK. BSP Brushes will also be used in the final level for simple geometry such walls, floors and gaps between Static Meshes.
- Alt+W = Cycle Static Mesh Visibility On/Off
STEP 07: Content Browser – Your Content Management System
Content Browser is UDK's Content Management System.
Inside Content Browser you will find all available Static Meshes, Textures, Materials, Sounds, Animations, Particle Effects etc.
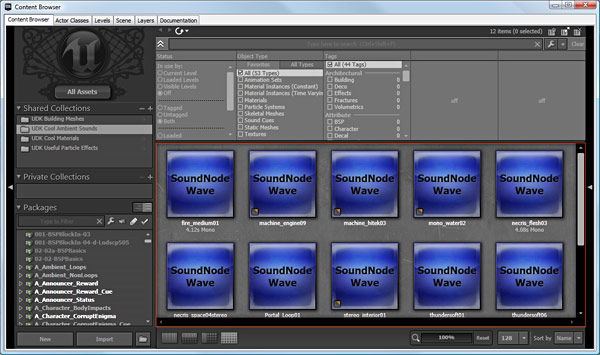
In order to use any actor listed above, you will need to access it through Content Browser.
To Open Content Browser, click on the icon in the main tool bar:

Or use a shortcut key:
- Ctrl+Shift+F = Open Content Browser
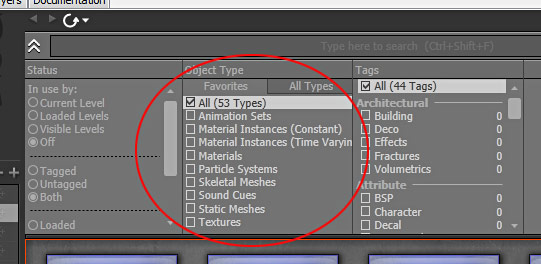
Filter by Object Type:
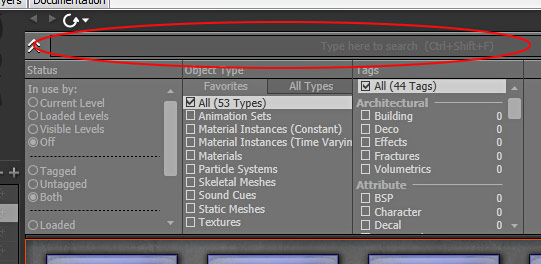
Search for a specific object name in the search bar:
You will be using Content Browser a lot to look for Static Meshes, Materials, Sounds etc.
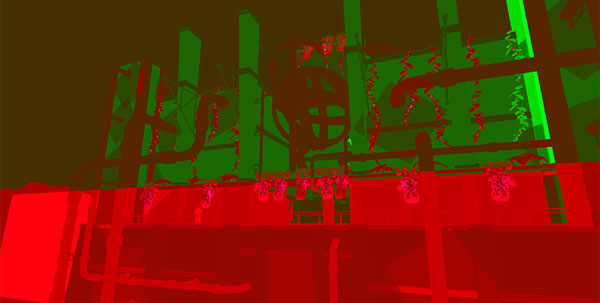
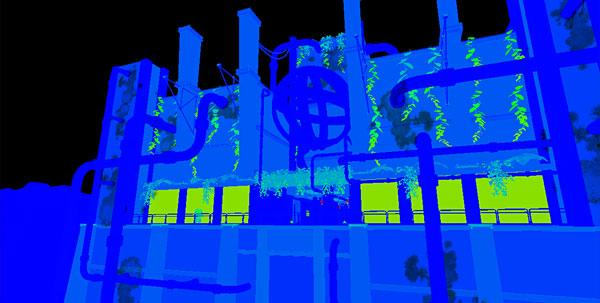
STEP 08: Viewport View Options
Each viewport contains 11 viewport viewing options. These 11 options are mainly used in the Perspective Viewport.
Each of the viewing options are specific to a process of working on your environment. So you may use Wireframe to check occlusion and rendering or Shader Complexity to optimize material use and rendering cost of materials.
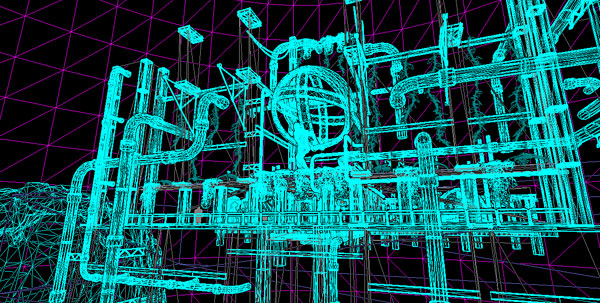
Brush Wireframe (Alt+1): shows wireframe brushes
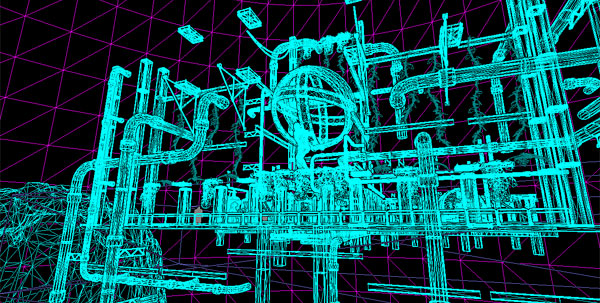
Wireframe (Alt+2): shows wireframe, will not allow brush selection
Unlit (Alt+3): no lights, makes navigation inside your Perspective Viewport a bit faster
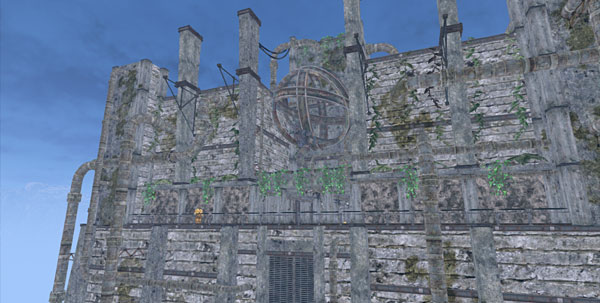
Lit (Alt+4): full lights preview, game preview
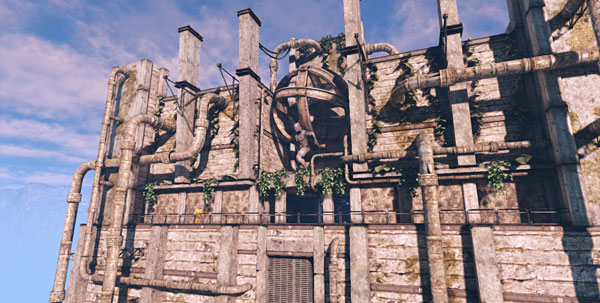
Detail Lighting (Alt+5): detail lighting
Lighting Only (Alt+6): lighting only
Lighting Complexity (Alt+7): lighting complexity (used for optimization)
Texture Density (Alt+8): how complex are your textures in the scene (used for optimization)
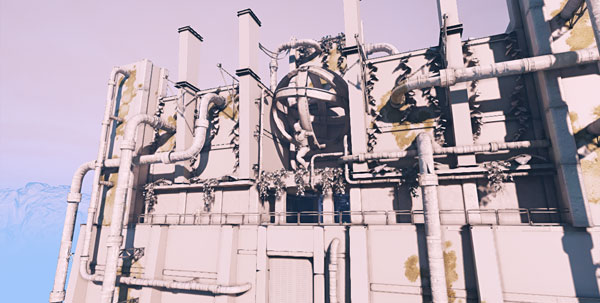
Shader Complexity (Alt+9): how complex are your shaders in the scene (used for optimization)
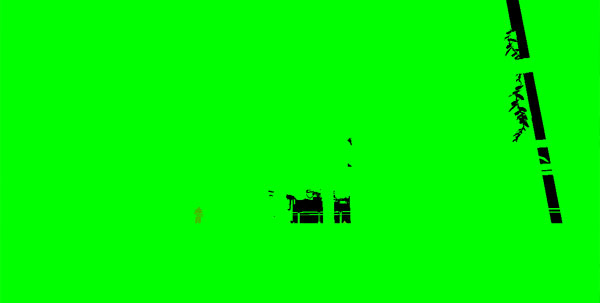
Lightmap Density (Alt+0): lightmap resolution (used for optimization)

Lighting only with Texel Density (Alt+ -): lightmap resolution with lighting
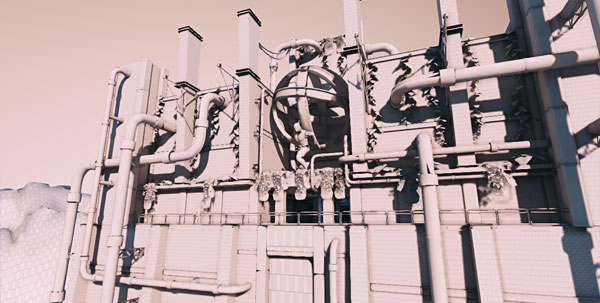
When starting with UDK, focus on the first 5 or 6. From Brush Wireframe to Lighting Only.
The rest are more advanced and you can focus on these later, when you get more comfortable with UDK.
STEP 09: Start a New Blank Map
Start a Blank New Map, go to File --> New Level and choose Blank Map
STEP 10: What is a Red Builder Brush
Red Builder Brush is a template from which BSP Brushes or Volumes are created from. The Red Builder Brush is invisible in game.

- B = Cycle Visibility of the Builder Brush On/Off
- F2 = Select Red Builder Brush
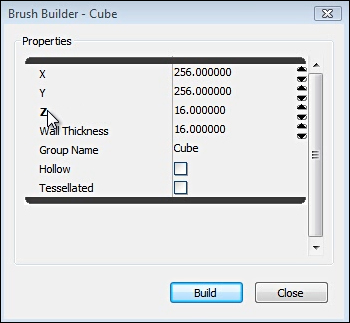
To change the shape of the Builder Brush, use the Brushes Menu and left click on the shape icons that you want to change it to:
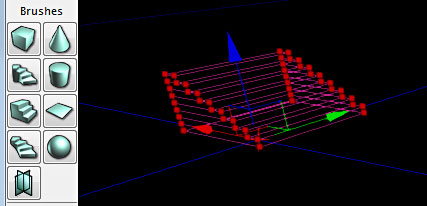
Right Click on Brushes Menu icons to bring up properties for that shape. Here you can change the settings and modify the Red Builder Brush before you add it into your level:
STEP 11: Working with BSP Geometry
From the Red Builder Brush template, you can add that shape as a BSP Brush.
You can use the CSG Functions Menu to do so:

Or you can use shortcut keys to speed up that workflow:
- Ctrl+A = Add BSP Brush from the Builder Brush
- Ctrl+S = Subtract BSP Brush (subtractive brushes work when you subtract from additive brushes that have already been added into the level)
Use Unlit Mode (Alt+3) to see bsp brushes, until you have added lights.
Selecting BSP Brushes:
- Ctrl+Shift+Left Mouse Click = Select a Brush in Perspective Viewport
You can use Wireframe Mode (Alt+1) to select BSP Brushes.
To delete BSP Brushes, select it using one of the options above and press Delete to remove it.
To See BSP Changes:
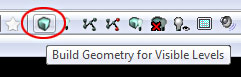
To see BSP Changes in Lit or Unlit mode, such as any BSP Brushes you modified or deleted, you need to Build Geometry.
Click on Build Geometry for Visible Levels icon:
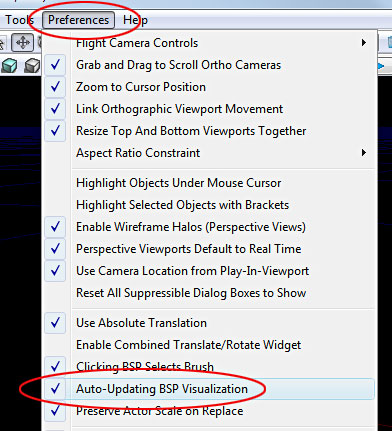
Better option is to update the settings in UDK so you can see BSP Brush changes in real-time.
- Go to Preferences --> Auto-Updating BSP Visualization:
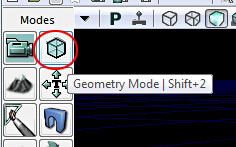
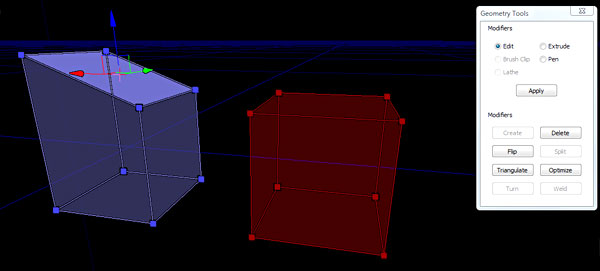
Geometry Mode (Shift+2):
Geometry Mode will allow you to modify already created BSP Brushes in your level. This menu is the ultimate workflow tool to modify your BSP Brushes.
Click on the Geometry Mode icon or press Shift+2 and select any BSP Brush you want to modify. You can even modify the Builder Brush:
Once enabled, you can select and modify vertices, faces or edges and change the shape of already created BSP Brushes:
STEP 12: Inserting Static Meshes (3D Models)
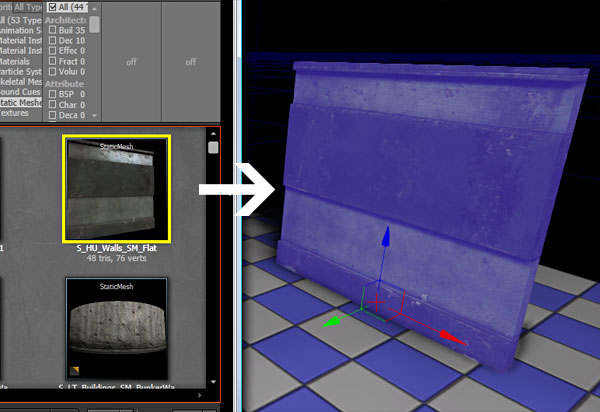
Follow these steps to insert a Static Mesh:
- Open Content Browser
- Filter by Static Meshes
- Search for a specific Static Mesh
- Select the Static Mesh
- Left Click and Drag from the Content Browser into your level (Perspective Viewport)
STEP 13: Adding a Human Reference Scale
Human reference scale will help you to judge proportion and scale of your level.

To insert a Human Reference Scale:
- Open Content Browser
- Filter by Skeletal Meshes
- Select one of the available Skeletal Meshes
- Left Click and Drag the Skeletal Mesh from the Content Browser into your level (Perspective Viewport)
- Position the Skeletal Mesh on top of your ground plane
STEP 14: AutoSave and Saving Your Map
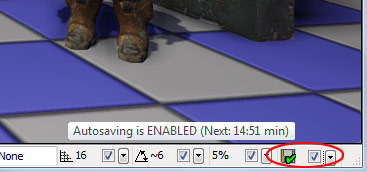
Auto-Save is enabled by default in UDK. This means that your map will be automatically saved for you at a specific interval.
You can keep this enabled and take advantage of Auto-Save option:
There are a couple of options for Auto-Save:
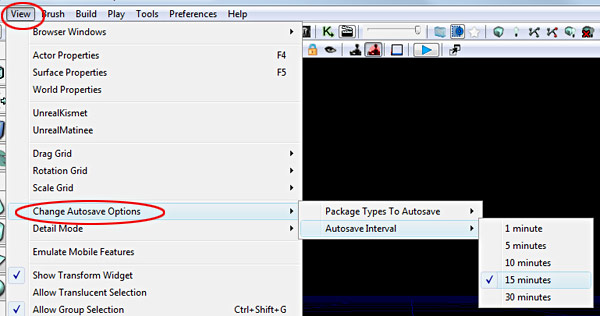
Go to View --> Change Autosave Options and choose Package Types to Autosave: this will auto-save Packages and Map Files (the difference between the two is explained in the next section):
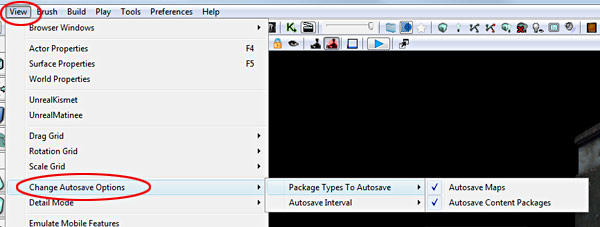
Go to View --> Change Autosave Options and choose Autosave Interval: set the amount of time between auto-save your map:
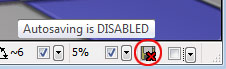
I personally like to manually save my work. So I choose to keep this option off:
Note: For Auto-Save function to work, you have initially save your map.
To save your map, go to File --> Save As
Navigate and place your saved map files anywhere into Content Folder within UDK folder structure.
I usually save my map files inside Maps folder:
C:\UDK\UDK-VERSION\UDKGame\Content\Maps
I also create another folder within Maps folder that is specific to a project.
STEP 15: What are Package Files and Map Files
There are 2 most common file types in UDK.
.UDK and .UPK
- .UDK = map file, this is your level that you see inside UDK
- .UPK = package file, this file type contains 3d models (Static Meshes), textures, materials, sounds, animations etc that you use to place into your level
STEP 16: Grid Snapping and Grid Settings
It is extremely important to keep your game environments and levels that you create on the grid. Grid Snaps and Grid Settings will help you do that. So, all of your BSP Brushes and Static Meshes should snap to the grid and to each other as you construct your worlds.
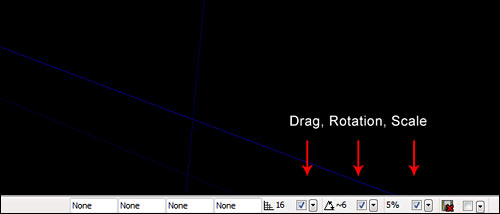
On the bottom right corner you have Drag Grid Option and Rotation Grid Option, Scale Grid:
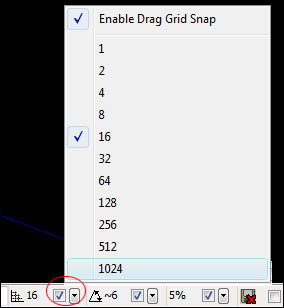
Drop down menu for changing the grid:
Always work with grid snaps turned on. There are 3 grid snap options. Rotation, Drag and Scale Grid. In some cases for fine detail work you may need to turn it off.
Uncheck/check: turns on/off the drag/rotation/scale grids.
- [ ] = (bracket keys) Increase/Decrease Grid
- Middle Mouse Click+Drag = Measuring Tool
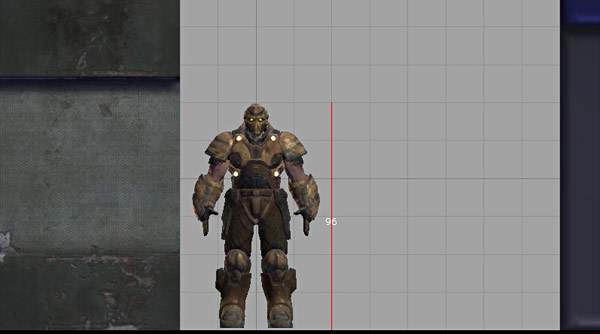
STEP 17: Character Height Inside UDK
Character Height in UDK is 96 units tall:
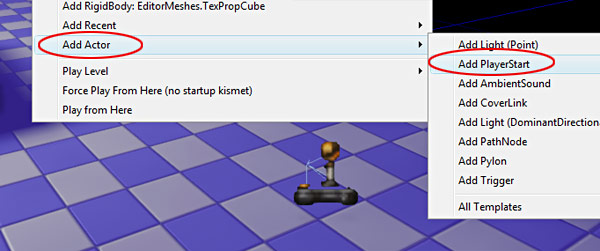
STEP 18: Inserting a Player Start
Every level needs at least one Player Start.
In Perspective Viewport:
- Right Click --> Add Actor --> Add Player Start
STEP 19: Play Test Your Map Inside The Editor
Play Test your map right from the editor. Here are the 3 options of doing so:
In Perspective Viewport - Right Click on the ground plane and choose Play From Here:

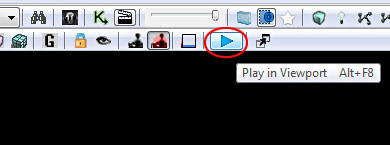
Press Alt+F8 to play in the viewport or click on the Play in Viewport icon inside the Perspective Viewport:
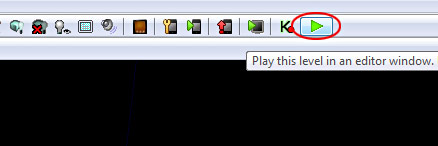
In the Main Top Toolbar, click on the Green Play icon 'Play this level in the editor window'. This will use the Player Start location to spawn you into your map:
STEP 20: Inserting a Point Light
At this stage, you need some sort of a working light to help you play test your level.
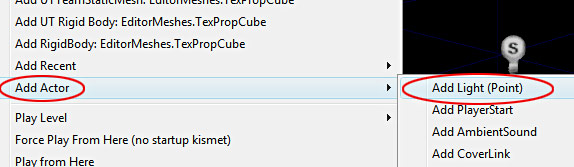
Insert a Point Light by Right Clicking --> Add Actor --> Add Light (Point):
Move the light up above your scene.
Double click on the light to open up its properties. Focus on the following settings:
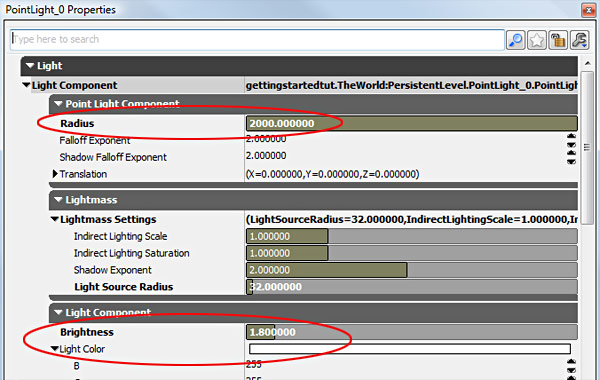
- Radius: affect of the light distance
- Brightness: intensity of the light
- Light Color: color of the light
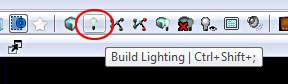
Click on Build Lighting to see correct lighting preview. On top toolbar, click on Build Lighting:
You can now use Lit Mode (Alt+4) to preview your environment.
STEP 21: Building Options
Here are Building Options that you need to know:
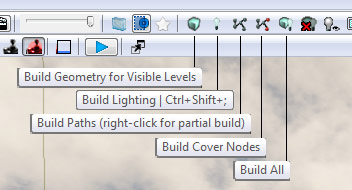
- Build Geometry for Visible Levels: builds and updates any changes or modification to BSP Brushes
- Build Lighting: calculates and renders correct lighting
- Build Paths: used for bots and path navigation of AI
- Build All: builds all (geometry, lighting and paths)
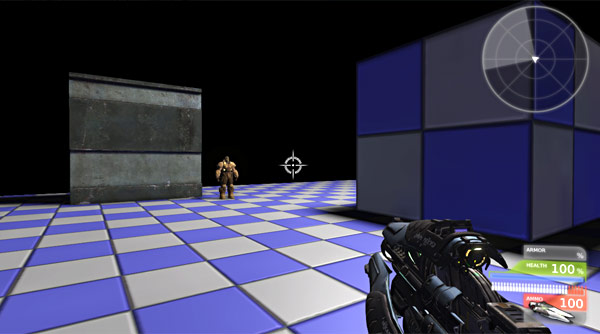
STEP 22: Enable Player Weapons and Hud
You may have noticed that when spawning into a map, you don't see Unreal Tournament Hud or any weapons.

To enable Hud and Weapons:
- View --> World Properties
- Game Type tab
- Default Game Type: UTDeathmatch or UTTeamGame or UTCTFGame_Content or UTVehicleCTFGame_Content
- Game Type for PIE: UTDeathmatch or UTTeamGame or UTCTFGame_Content or UTVehicleCTFGame_Content
- Make Default Game Type and Game Type for PIE match

SUBSCRIBE & GET FREE UE5 PDF GUIDE
Subscribe to receive NEW/UPDATED and FREE "UE5 Beginner's Quick Start Guide" PDF (90 pages).

Visit this page for more info about the guide...
TOP 7 TUTORIAL COURSES FOR 2026
 Modular Environment Design Masterclass Tutorial Course
 Maya Foundation: Home-Study Course - Model and UV Environments
 Substance 3D Painter Essentials - Master Texturing
 UE5: Fundamentals Vol.1 - Create with Unreal Engine 5
 UE5: Retro Office Project - Create Beautiful Interior Env
 UE5: Master Material Creation - Create Master Materials in UE5
 Preproduction Blueprint: Plan Environments and Level Designs
TUTORIAL CATEGORIES
UE5 FUNDAMENTALS VOL.1 COURSE

UE5: RETRO OFFICE PROJECT

MODULAR ENVIRONMENTS MASTERCLASS

LEARN THE PREPRODUCTION PROCESS

ABOUT WoLD & ALEXG

My name is AlexG. I am self-taught level designer, game environment artist and the creator of World of Level Design.com. I've learned everything I know from personal experimentation and decades of being around various online communities of fellow environment artist and level designers. On World of Level Design you will find tutorials to make you become the best level designer and game environment artist.
Home Terms of Use/Trademarks/Disclaimers Privacy Policy Donate About Contact
All content on this website is copyrighted ©2008-2024 World of Level Design LLC. All rights reserved.
Duplication and distribution is illegal and strictly prohibited.
World of Level Design LLC is an independent company. World of Level Design website, its tutorials and products are not endorsed, sponsored or approved by any mentioned companies on this website in any way. All content is based on my own personal experimentation, experience and opinion. World of Level Design™ and 11 Day Level Design™ are trademarks of AlexG.
Template powered by w3.css